Authentication is a word almost every developer hates, but it doesn't have to be difficult anymore. Using Clerk allows you to add authentication to an application in minutes whether this is Next.js, React, Redwood or vanillaJS.
Clerk uses high converting drop in components that look great and can be customized to fit your brand, which is why I have been using it for every single application I have written for the past year.
What are we learning?
When you get to the end of this post, you will have learned how to integrate authentication with Clerk and Next.js. The steps are as follows:
- Create a new Next.js application
- Create a new Clerk application in the dashboard
- Add Clerk to the Next.js application
- Use the Clerk components to handle signed in and signed out users.
Create Next.js application
To start we need to create a next.js application locally so we can start developing our application. Run the following command from your terminal
Once the create-next-app function has finished running make sure you move into the directory using cd clerk-with-next.
Create our Clerk Application
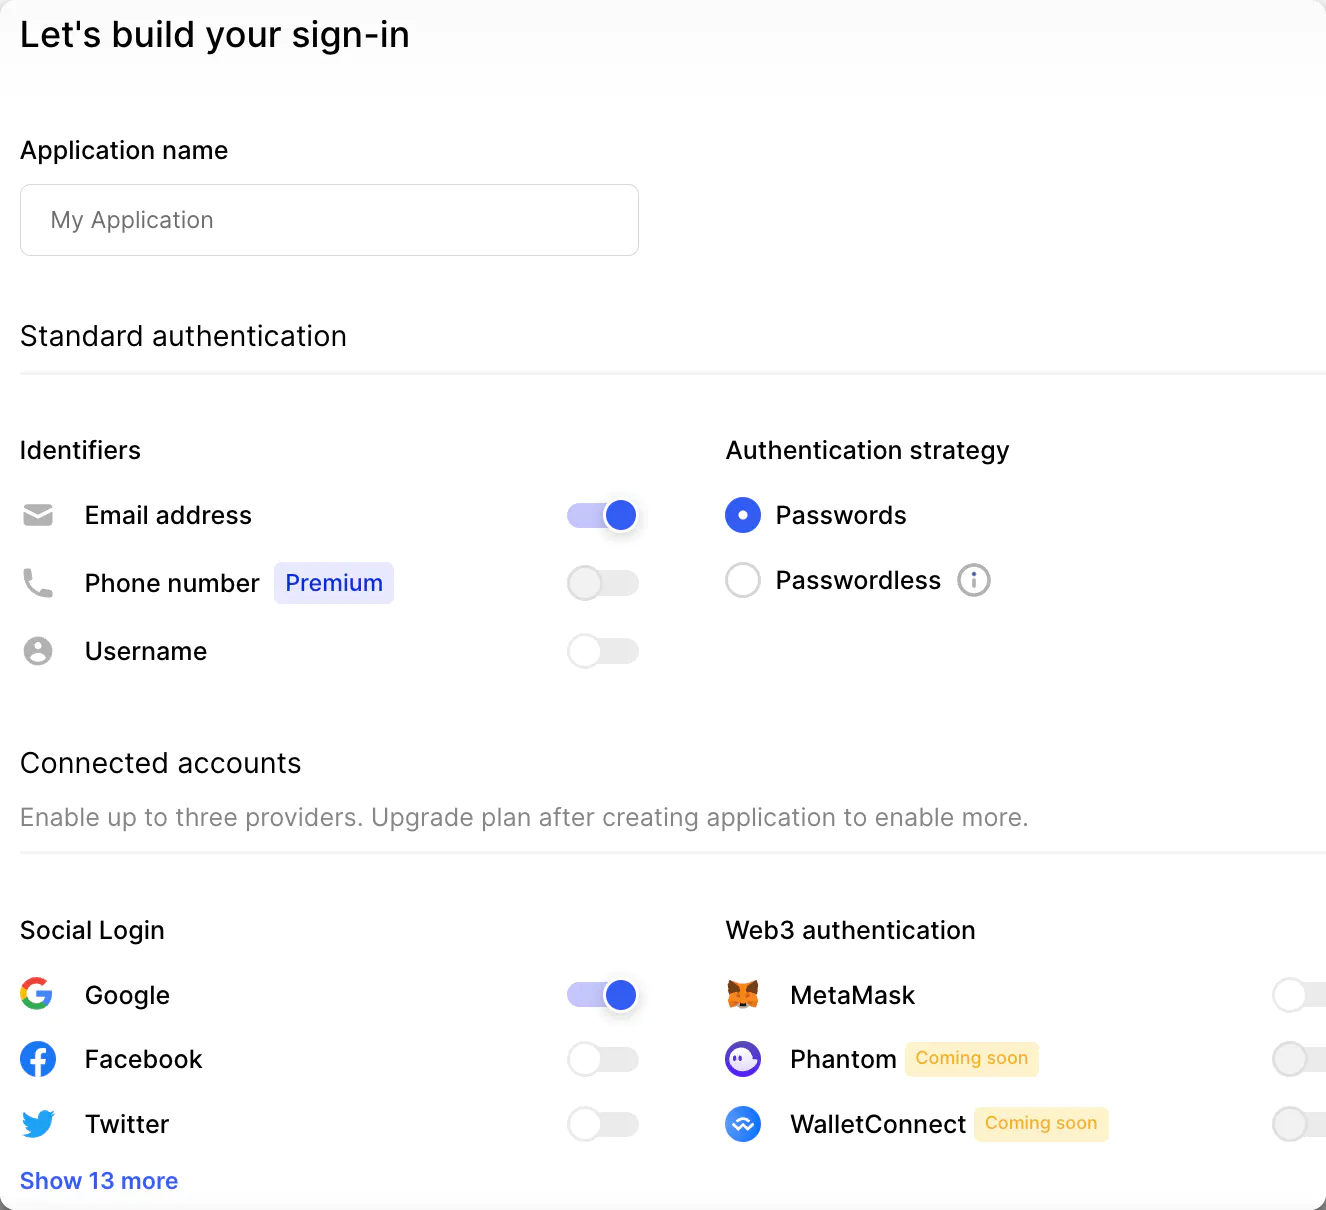
At this point we have an application, so now we need to add our authentication provider. Navigate to https://clerk.dev and sign up for an account or sign in if you already have an account. Then select the social logins that you want, password or passwordless and all the bells and whistles you want.
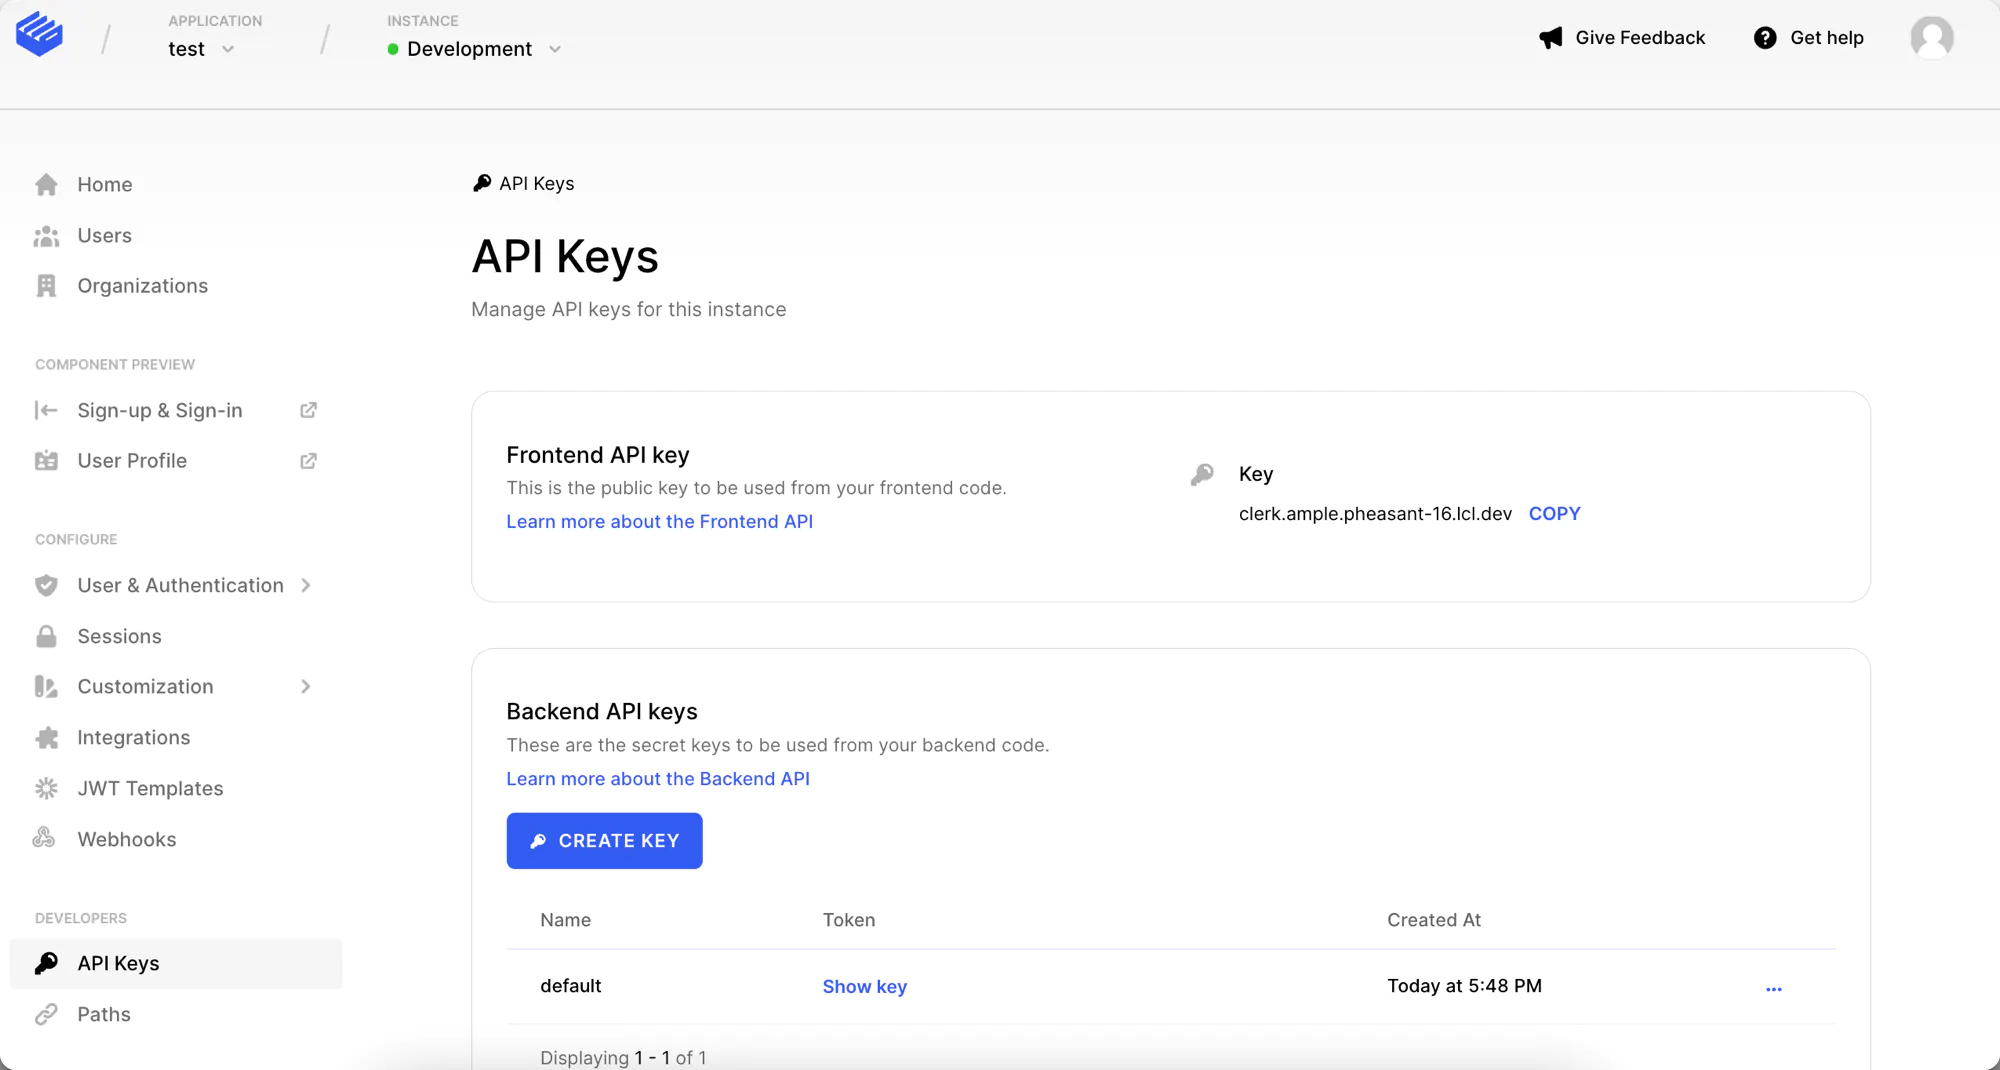
Now that your application is setup, we need our frontend API key so we can have our users authenticated. Select API keys from the left hand menu and then copy the frontend API key we are going to use this in our Next.js application
Add Clerk to the Next.js application
At this point, we have our Clerk application, and Next.js application so now it is time to integrate them. In your terminal add the Clerk Next.js package to your Next application.
npm install @clerk/nextjs
Now open your application code in your favorite IDE, because you are almost done already! Open the _app.js file as we need to wrap our application in the <ClerkProvider>.
import '../styles/globals.css'
import { ClerkProvider } from '@clerk/nextjs'
function MyApp({ Component, pageProps }) {
  return (
    <ClerkProvider>
      <Component {...pageProps} />
    </ClerkProvider>
  )
}

export default MyApp
Handling signed in users and signed out users
Now our application is set up with the <ClerkProvider> we can now start looking at handling the two states of signed in and signed out. Clerk provides components that handle these states and then on top of that beautiful components to get your users in your application.
We can start by using <SignedIn/> and <SignedOut> components as they will handle the two states we care about.
import '../styles/globals.css'
import {ClerkProvider, SignedIn, SignedOut} from "@clerk/nextjs"

function MyApp({ Component, pageProps }) {
  return (<ClerkProvider>
    <SignedIn>
      <Component {...pageProps} />
    </SignedIn>
    <SignedOut>
    </SignedOut>
  </ClerkProvider>
  )
}

export default MyApp
Our application is now protected, except we don't have a way to get the user into the application. For that, we can use the <SignIn/> component that will allow the user to Sign in to our application.
import '../styles/globals.css'
import {ClerkProvider,SignedIn,SignedOut,SignIn} from "@clerk/nextjs"
function MyApp({ Component, pageProps }) {
  return (<ClerkProvider>
    <SignedIn>
      <Component {...pageProps} />
    </SignedIn>
    <SignedOut>
      <SignIn/>
    </SignedOut>
  </ClerkProvider>
  )
}

export default MyApp
We could finish the tutorial right now, but what if we wanted to allow the user to manage their account and log out? Clerk has a <UserButton/> component that does both of these.
import '../styles/globals.css'
import {ClerkProvider,SignedIn,SignedOut,SignIn,UserButton} from "@clerk/nextjs"
function MyApp({ Component, pageProps }) {
  return (<ClerkProvider>
    <SignedIn>
      <UserButton/>
      <Component {...pageProps} />
    </SignedIn>
    <SignedOut>
      <SignIn/>
    </SignedOut>
  </ClerkProvider>
  )
}

export default MyApp
Now our application is finished, the user can sign in and sign out. They must be signed in to access our pages.
Next Steps
This is just the beginning of Clerk, there is so much more to explore. Check out their documentation at [https://docs.clerk.dev] where you can explore things like customization, integration, authorization and so much more!